
"The Ho" (7)
Third Trip
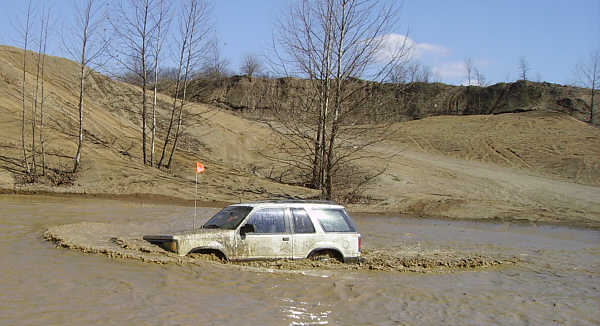
Since it looks like we can't use the river bottoms at West Terre Haute our third trip, with the newly welded rear differential, was to Coal Creek on 15th March 2006. "The Ho" behaved superbly and took on the creeks, tracks, trees, mud and hills of the area without a problem. There was a slight problem in the fact that I nearly overturned and rolled it down a hill, but catastrophe was adverted by lots of advice from Andy and Dave. The maneuverability, power and road-holding of "The Ho" made for several hours of great entertainment.
Whilst driving it home, both the Brake and ABS warning lights came on which is a bit worrying and will need looking at. Both the About Auto Repair and Part Trackers sites have information about this problem. Hopefully it's just water or dirt in the sensor but how it got there is anybodies guess!
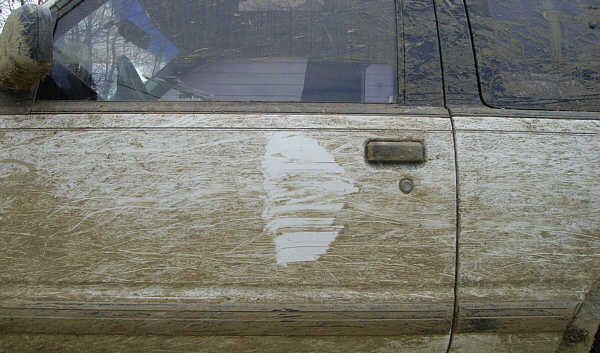
Scrapping against a tree is an interesting but ineffective way of cleaning off the mud.
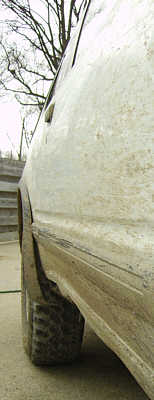
I managed to damage the passenger side rear wheel-arch
It looks like the screws have pulled out which wasn't too hard to fix.
A couple of nuts and bolds replaced the damaged screws and it looked as good as new.
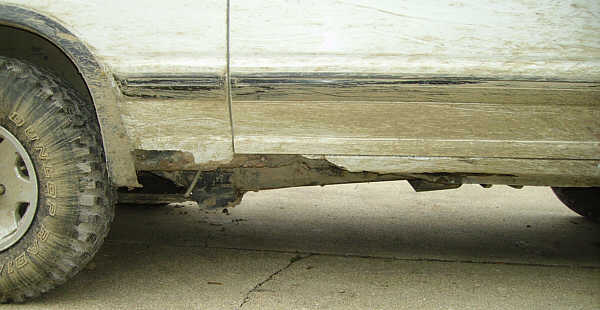
It also looks like we've lost a bit more rust from the passenger side
As I'd nearly turned "The Ho" over on that trip a couple of days later I bought some vinyl lettering and added a warning message to the back of it...

Air Intake / Snorkel
The air intake of the Mazda Navajo isn't in the best place in the world for off-roading. It's at the front of the vehicle, on the passenger side of the radiator and about 3" under the protective plastic cover.
Air intake
A professional snorkel costs around $300 but we're going for something a bit cheaper than that. Whilst looking around for ideas found some interesting pictures and information by Buchvilleman, DasFrem and Sapogmxr on the Explorer Forums site. Brett Nash came up with a nice solution. I also like the design of this outlet. The cowl or short tubes I think are the way to go as if the water is up somewhere near the roof then maybe you shouldn't be there.
Water in the engine is called hydrolocking and causes the engine to stall and even more serious damage to the engine. The following is from PREP
Hydrostatic lock, hydraulic lock or hydrolock occurs when liquids, typically water, enter an engine cylinder. This can occur from a coolant, oil or fuel leak, but the chief cause is drawing water into the engine through the air induction system (airbox & filter, ducting, throttle body or carburetor, intake manifold). Internal combustion engines (spark or compression ignition) operating on a two-stroke or four-stroke cycle must employ a compression stroke to compress the charge (usually an air/fuel mixture). Liquids are incompressible; the presence of a liquid in the engine cylinder during the compression stroke generates destructively high cylinder pressures.
Abnormally high cylinder pressures can bend and break pistons, piston pins, connecting rods, crankshafts and ruin bearings and can crack or break cylinder heads and engine blocks. Small amounts of liquids may pass through an engine cycle without damage, but volumes exceeding 40cc (1.4 fluid ounces, <3 tablespoons) will cause many engines to develop cylinder pressures well in excess of 1000psi. A larger volume of water, up to the combustion chamber volume (usually 60cc to 100cc), will generate increasingly high cylinder pressure during the completion of the compression stroke. Volumes of water which exceed the combustion chamber volume will "stop" a running engine through true hydrostatic lock. Something expensive always bends or breaks when this happens.
Hydrolock may occur while the engine is running, the work of the compression stroke being supplied by engine's rotational inertia. Or a liquid may leak into the cylinder while the engine is being stored; the work of the compression stroke will be supplied by the starter motor.
Hydrolock is not a new problem, but it only affected certain applications. Older American made cars, particularly with V-configuration engines, often employed an air intake location which was high in the engine compartment. Because of the reduced tendency of these older American cars to hydrolock, it has not been in the forefront of design consideration and is not a household term.
Most newer, fuel injected cars have the air intake located low in the engine compartment. The objective of this low air intake is to draw cool air into the engine. Unfortunately, when driving through sufficiently deep standing or splashing water, engine vacuum from the intake stroke will suck water into the engine, particularly if the intake is submerged.
The cost to repair hydrolock damage begins at about $1000.00, and only goes sky high from there. Repair bills in excess of $35,000 have been reported in high-end passenger cars. Racing engines can cost twice that amount. Many new cars have been recognized as having poor designs to prevent hydrolock. Even some Four-Wheel-Drive pickup trucks and SUV's have been identified as having particularly high incidence rates of hydrolock. Manufacturers' warranties do not cover hydrolock engine damage, stating that the cause of operator error. One SUV manufacturer states the maximum vehicle speed through standing water to be 5 mph; hydrolock occurring at speeds in excess of 5 mph is judged to be operator error. The repair may be covered by a vehicle's Collision/Comprehensive insurance.
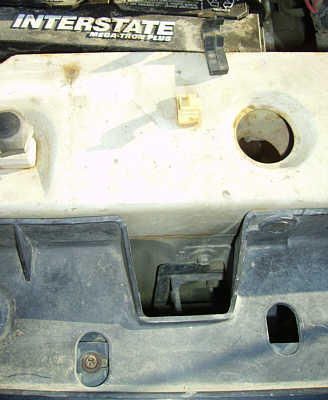
On 17th March 2006, the air intake was modified to try and stop "The Ho" sucking in water. The mod simply consisted of disconnecting the standard intake, sealing the hole and creating a new one at the rear of the box.
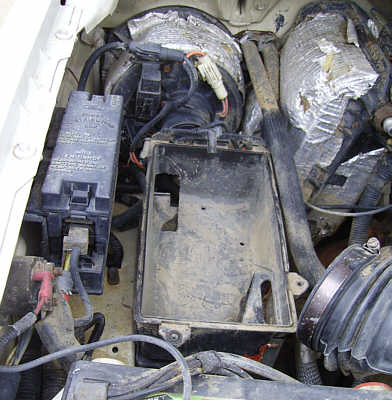
The old airway is at the bottom right, the new is top left
It's a very simple modification but effective. It allows "The Ho" to go through fairly deep water without stalling...
Attica Badlands - 18th March 2006
Lift Kits
A lift kit does not usually add to the vehicle's ground clearance, fitting larger tyres usually does this. What a lift kit does is raise the body allowing larger tyres to be fitted and also to allow them more "up and down" movement (articulation), this means that the terrain travelled over can be rougher than normal. The lowest part of the vehicle still usually remains the differentials. If the lowest point is the transfer case then a lift kit can increase the ground clearance.
A body lift lifts the body above the frame by inserting blocks or spacers between the two. Although it does allow the use of larger tyres the suspension isn't made any better and there are additional problems in that other parts, like bumpers, steering, gear shifts etc. may need to be changed to accommodate the extra height. They are also a lot cheaper than a suspension lift being around $200.
A better option is a suspension lift. A good suspension lift will not only add lift but also strengthen and generally improve the suspension and give better articulation. The problem with these is the cost, a 4" suspension lift costs at least $500.
A cheaper alternative to either are spring locks, also called spring clamps. You can buy these for less than $10 a pair. These can be inserted between the coils of the front springs to either separate the coils to raise the vehicle or to clamp them together to lower it. When we fitted the larger tyres on 4th March 2006, this is the option that we chose.
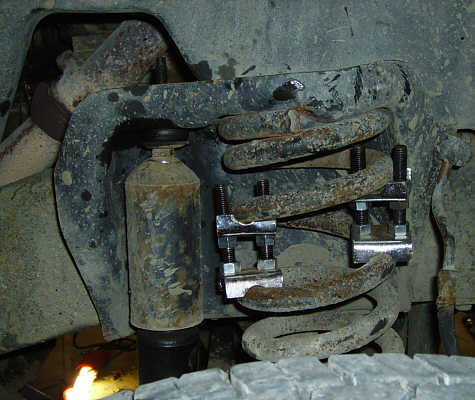
The fitted spring locks
Another way to raise the front springs is to use spring spacers, these fit either end of the spring and cost around $100.
As for the rear leaf springs, a spring over, ie, the springs sit on top of the axle instead of being slung underneath will give at least 4" and probably over 5", of lift. You can also use a "add a leaf" kit for around $150.
This page created 16th March 2006, last modified 21st March 2006